Category: Farm Life (Page 3 of 4)

This is where we’ll show off our paradise and the changes/improvements we are making to it.

Cicada Serenade

I expected much worse. I envisioned daily sessions with the leaf blower clearing pathways through the swarms of decaying carcasses. I’ve heard some parts of this county ARE experiencing such an infestation but just a minor nuisance for us so far. Luckily, we are on the very western edge of one of the 2 varieties making their presence known, so not as bad as further east of here.

I heard a local entomologist explain that the infestation is directly related to the conditions in that area when they went underground. If there is something favorable for them in that area, they’ll be back when their cycle tells them to emerge. I heard of one farmer a little west of Houston, MO who is inundated with them and the farm across the road (their in-laws), has no such problem.

We still find bugs (dead or still alive but dormant) everywhere. I had one land on my bare back and sort of creeped me out when I brushed it away and it was the size of my thumb. Overall though, they are quite docile – just waiting to die. However, now it appears that even the chickens have had their fill of them.

Even though they are not swarming everywhere, they are still plentiful. This young tree across the driveway exploded in fleeing bugs when my errant frisbee shot disturbed them. A huge cloud took flight and then returned to the tree. Notice the little holes? Once they have mated, they’ll find such a tree and embed their eggs in the holes. They keep digging and burying eggs in such a way spiraling up the tree until they are empty. Then, they find a quiet place to die – which are the ones we see on the buildings or any other place to perch.

What is measurable however is the noise. I previously heard that it will be deafening but it took us a while to recognize it. I expected the high pitched buzzing noise we’d hear high in the trees late in the summer in MN. But this is more of a frog sounding chirp you’d normally hear in the evening but this blares all day long. It’s similar to the tinnitus we are adjusting to in our advanced years – just much louder. And it dies down at sunset – opposite of the frog chirping. (We’ve learned the frogs “peep” down here – unlike MNs ribbit or croaking).

Here is an example of the din from our morning walk with the dogs. This is along the front edge of our back woods and sadly the phone video doesn’t do it justice. Turn it UP! For perspective, you’ll hear Sherry calling the dogs towards the end of the clip.

What is drastically different from normal is the cicadas drone on all day long but quiet down at sundown. That’s when you can hear the actual crickets and frogs.

But, in a few more weeks, we’ll be done with them. The new generation (larvae) will be burrowing into the ground for the next several years before it is their turn to emerge for their final 2 weeks of fun.

The Swimmin’ Hole

As I mentioned earlier, We are filling our pool using rainwater this year.

Rainwater collection for the pool.

I have also tied in the back of the house since this picture.

The good?

  • Natural (ample over time) water source.
  • Doesn’t tax the well and pump.
  • Water is naturally softened and balanced in PH/alkali content.

The bad?

  • Until the pool is nearly full and the pump/filtration can be activated, the untreated collected water is stagnating in the sun. In the interim, I set up a simple sump pump to run through the filter system to keep the water moving during this filling stage.
  • Collected water is (or quickly turns) greenish brown. Much appears to be sediment that can be brushed/swept away. Once the level reaches the filter basket and the main pump is active, a thorough vacuuming of all pool surfaces should greatly clear up the murkiness and the chemicals should do the rest.

Update 20240518: With the pool now full (mostly pump/well at 1″ per hour – as the forecasted deluges never materialized), I am switching into clean up mode. The problem is it appears our 1 year old pump is now bad. After a few weeks of collecting stagnant untreated water, it was quite putrid originally. Once I realized our pump wasn’t pumping, I swapped in a sump pump I had on hand and forced that through the pump/filter housing. After a few hours, the water cleared up considerable. However, what I really need to do is thoroughly vacuum every surface to get all of the pollen and other sediments that landed in the pool along with the seeds from the various trees. However, I can’t do that until I have a working pump running from the debris basket to the pump/filter and that won’t be delivered for a few days yet.

Damn. And we’ll be getting close to 90 tomorrow.

UPDATE 20240616:
The completed pool project is working wonderfully. Here is my final solution.

Besides making MacGyver insanely jealous, there is a method to the madness. All rainwater from the gutters flows into the pool via the elevated pipe in the middle. It is elevated because that is a regular walking path. Then, starting on the far right, that gray object beneath the ladder is where the water is supposed to flow back into the pool after the pump. However, it wasn’t until the pool was filled that I discovered this was plugged (maybe a mud dauber) so I bypassed this and have the hose from the pump (white hose beneath ladder) flowing directly into the pool. I then installed a valve below the new filter basket so I can work on pump/filter issues without the pool draining down to the bottom of the basket. The nearly horizontal hose traversing right to left is for when we flush (backwash) the sand filter and discharges close to the ground. The little “U” shape hose in the middle does nothing. This pool came with multiple options and this could be used for a heater but we don’t need it so we simple ran a hose from one connection to the other. I could also simply plug each one but haven’t found anything suitable. The hose coming from the left is another “option” that wasn’t used. However, now with rainwater pouring in during storms, this keeps the pool from overflowing and the water depth can be adjusted simply by turning this fitting to the desired level. All overflow water flows out the same discharge as the backwash/rinse modes of the sand filter. On forecasts of heavy storms or rain, I’ll hook up our RV drain hose to that discharge so the flood flows downhill away from the yard.

I know that is more than anyone cares to know but just know this set up is working “swimmingly”. (Sorry, I couldn’t resist).

Project Progress

Last year, we just set the pool up in the middle of the yard, trying to catch sunlight and avoid being under the pecan trees (for obvious reasons). It wasn’t ideal (too close to the chicken run) so we decided to relocate it closer to the house.

We intended to set up at the south end of the house, so that meant removing 2 huge limbs on the 2 pecan trees above.

There is nothing more fun than operating a chainsaw while perched high on a ladder!

We did the first one (#2 above) a few weeks ago. It was pointing straight to where this pic was taken from – slightly overhanging the fence in the foreground. Hoping to avoid the fence, I cut the “hinge” so it should fall to the right into the yard. I had to take down the line of lights that ran from the house to the garage as well as our network cable suspended above (just below yellow line).

I was paranoid about it kicking out the ladder I was perched high up on so I positioned the ladder opposite the limb as much as possible but made the cutting action very awkward. It safely fell but it DID also wipe out that section of fence. Oh well, it was separating from the post anyway and needed attention. Luckily, I only had to replace that 1 section next to the gate.

For the other tree (#1), this wasn’t as high so was easier to get at. From the ground, I estimated that the very tip of the falling limb might brush the lights/network cable that were reinstalled after the first limb was removed. Turns out 8″ or so DID brush the line but were very small branches and the line wasn’t damaged at all. I cut the larger sections into 4′ lengths – hoping to mill it down to be usable for building projects and the smaller sections were cut up for firewood to be used next year. I was surprised at how much wood we got out of those 2 limbs but both were 12+” diameter at the base.


Yesterday, with a rare nice day in an endless string of monsoons and storms, we got the pool set up and used the well to put in the first 8 or 9 inches of water while we smoothed out the bottom.

However, rather than taxing our well/pump, we’ll be using the storms to fill it the rest of the way, rather than turning the yard into muck.

Rainwater collection for the pool.

One of our goals is to eventually capture as much rainwater as possible – from all 4 buildings so this is the first stage of that. Rather than dropping into a bucket (or pooling up in the yard), I rerouted the front side gutter to turn the corner to continue down the side of the house. In the middle (between the bedroom windows), I put in a downspout that typically fills a rain bucket. With a simple (temporary) modification, it will now fill the pool. In a couple hours time, I could (and will eventually) tie in the back side gutters the same way. Now, I am curious to see how quickly it fills.

Once filled, we’ll strain out the larger debris (and bugs) and the pool pump, filters and Roomba type pool vacuum will take care of the rest. Once clear, I can treat the water to the right PH/chlorine balance just as we did previously.

One concern is that until it is filled, the pool is vulnerable to wind damage from storms so will be watching the forecast closely and will remove the legs (and lower the profile) by dropping the top ring down onto the rest of the pool.

We’ll experience this season as it is to be certain we like the location but the plans are (if we like it) to recess the pool halfway into the ground and then build a simple deck around part or all of it.


Finally, I had been noticing my zero turn wasn’t cutting very well so I winched it up in the shop and saw this.

That’s a new (black) blade behind an old one removed from the mower. I’d call it a bit worn, wouldn’t you?

All 3 blades were quite mangled and is why I noticed uncut lines in the mowing path as they no longer overlapped as they should.

Now, I need to refrain from using the zero-turn for the rough stuff and save that work for my “NASCAR” tractor. That’s my old Craftsman with a broken front axel that only turns left. I bought a welder to fix it but first I need to learn how to weld.

Goodbye Ruthie

Sadly, we recently lost Ruthie unexpectedly. It was in the morning after being let out of the coop to the run. Soon after she was down on the ground but remained upright moving her head and the 2 roos kept “hitting on her”. I’d nudge them off but then we noticed something wasn’t right with Ruthie and she wasn’t trying to flee their advances as the hens usually do. Sherry picked her up and she was visibly in distress by this time and vomiting. She died within minutes. We are suspecting a heart attack but have no way to know for sure. We’ve kept close watch on the others and the rest all seem fine.

Luckily, she was able to have a Viking funeral. Maybe not a real boat but I had a huge brush pile built up with all of the tree work I had been doing and planned to burn it off now that everything has greened up. I added some good sized logs to arrange around her (in the shape of a boat) and set it off. It burned hot and heavy for a good hour and by the time it was all done in the evening, it was simply a small pile of ashes out in our field. I know I should have “processed” her but just didn’t have the bandwidth at the time. She would have been a tasty treat for the dogs and cats (or me) though.

It’s too bad. She was certainly our prettiest hen and a consistent egg producer.

Good bye Ruthie. Thank you for your service.

Spring Planting Completed!!!

WooHoo! We finally have (most) everything in the ground (or pots or bins). There is still space for a few dozen more plants. We’ll either use that for something we haven’t tried yet or use it for 2nd crops later in the summer.

Here’s is what we are anticipating:

On the front porch (in pots and bins):

  • Oregano
  • Thyme
  • Rosemary
  • Echinacia
  • Basil
  • Peppermint
  • Dill
  • Nasturtium
  • Garlic

In the garden:

  • Sweet Corn
  • (Sunset Runner) Beans
  • Kale
  • Broccoli
  • Snow Peas
  • Snap Peas
  • Carrots
  • Cucumbers (several varieties)
  • Radishes
  • Peppers (several varieties)
  • Beets
  • Jalapenos
  • Onions (green, white and yellow)
  • Cabbage (several varieties)
  • Sage
  • Lettuce (several varieties)
  • Arugula
  • Cilantro
  • Romaine
  • Cauliflower
  • Celery
  • Calendula
  • Lemon Balm
  • Tomatoes (several varieties in 10 bins)
  • Watermelon
  • Pumpkins (2 varieties)
  • Cantalope
  • Black Oil Sunflowers

Last year, we were tentative – not knowing what would be successful and what wouldn’t so we only planted about a 1/3rd of the available space. This year, with last years surprising success, we mostly filled it out but are still not sure if it will all thrive. Like everything here, we are learning as we go.

Now, we need to develop our “canning” skills. Hopefully, we’ll be extremely busy come this fall.

Waterworks / Irrigation

I’ve been asked about how we keep everything watered. It’s not as easy as it sounds with everything spread out and only a single water source available but I’ve been working/adjusting/tweaking this for over a year now and is getting just about ideal for us now.

As Sherry knows, I am pretty anal when it comes to this and am not a fan of constantly hooking/unhooking/untangling hoses and dragging them around. Added to that is the absolutely terrible quality of most products sold for this purpose. I’ve rarely ever had a nozzle, sprinkler, hose or any other component of these last more than 2 years so my goal was to eliminate their incompetence by doing as much on my own as possible.

Everything (in pots/tubs) on the porch is watered by hand using rainwater collected in tubs below the downspouts so no big deal but for everything else, we needed closer sources to get the water.

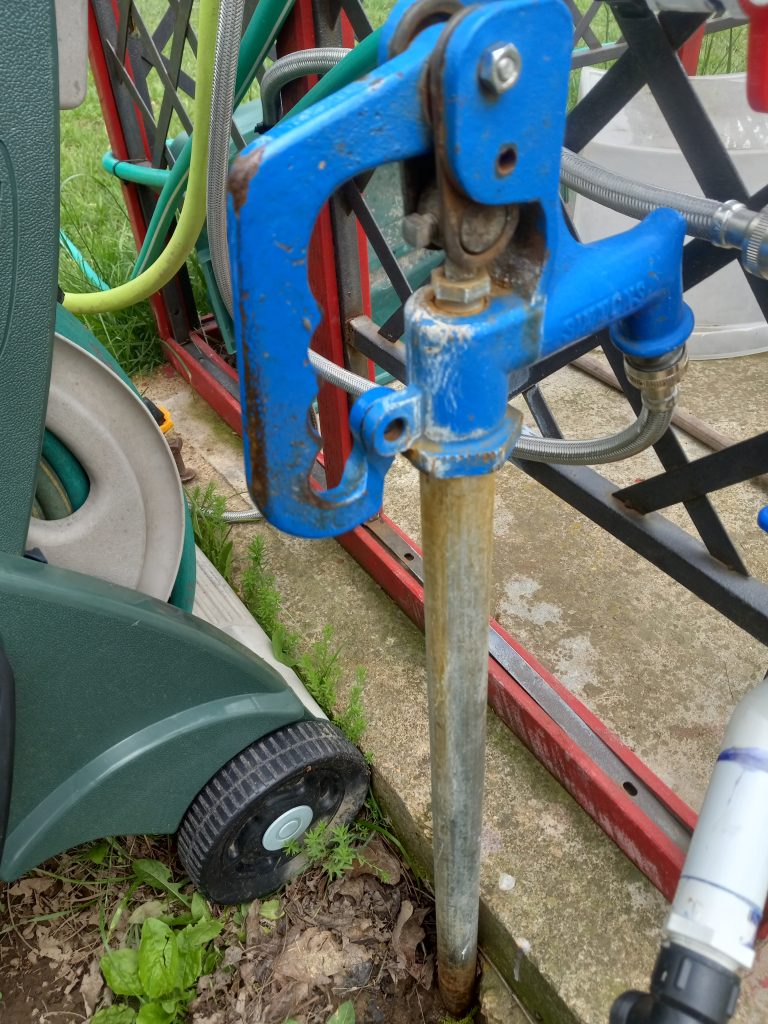
The problem is, THIS is our only source for water outside of the house. This freeze-proof spigot is located by the old well head just off the back porch.

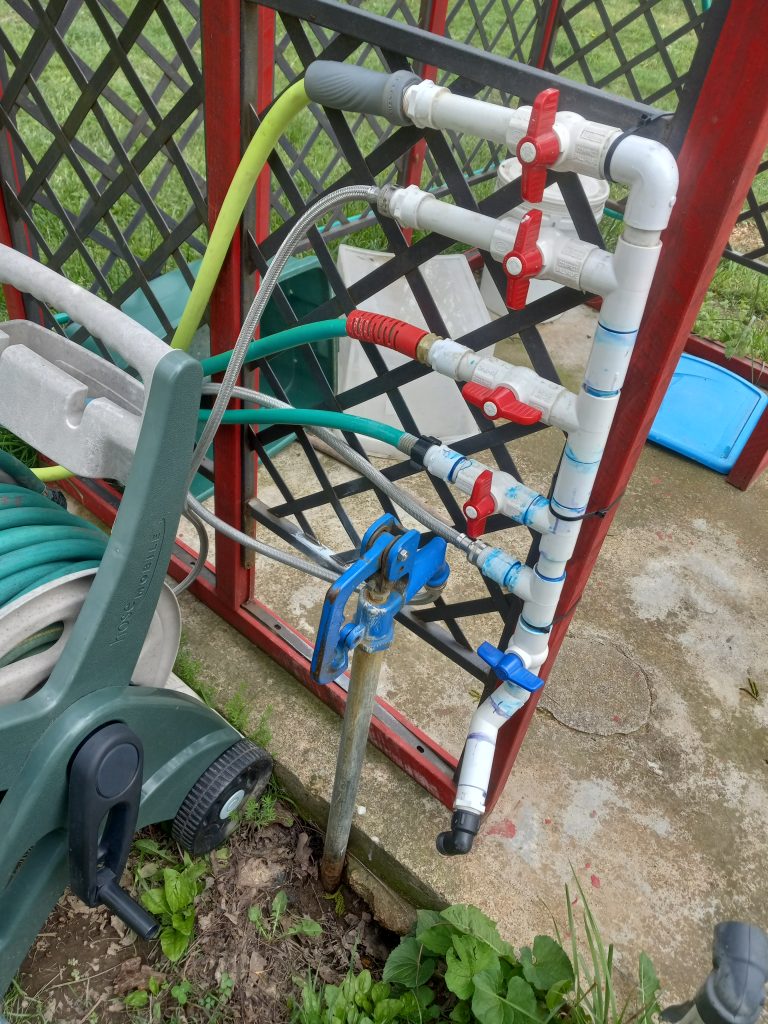
So, immediately I split this single hook up to 5 new ones using PVC valves and 3/4″ piping.

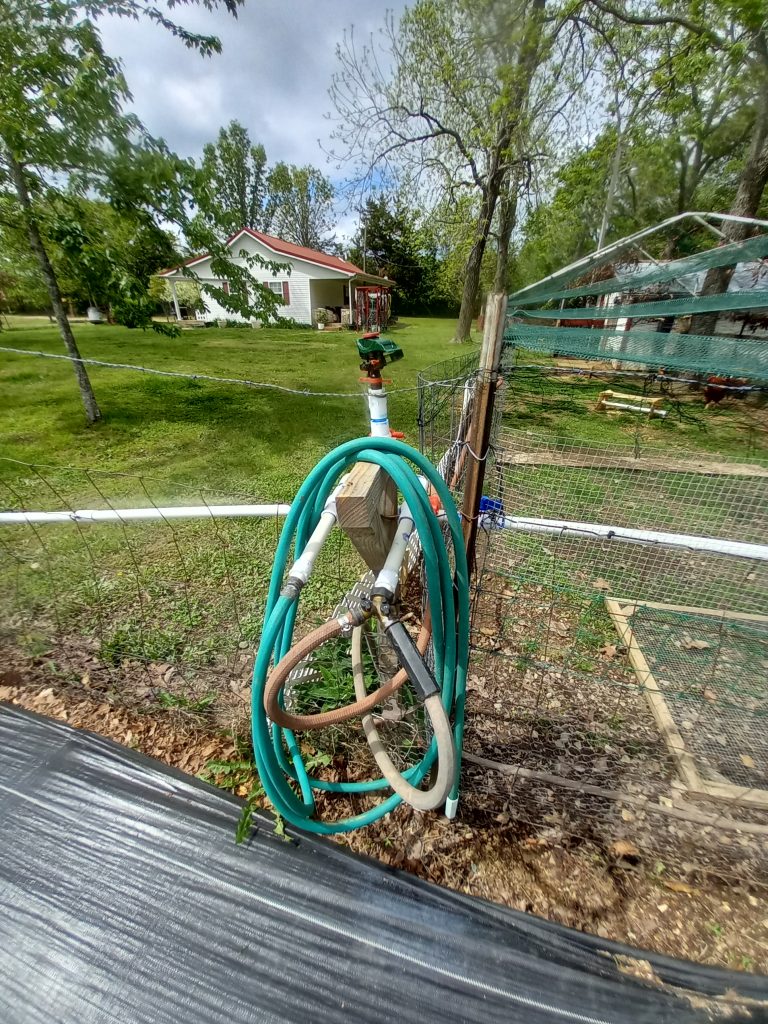
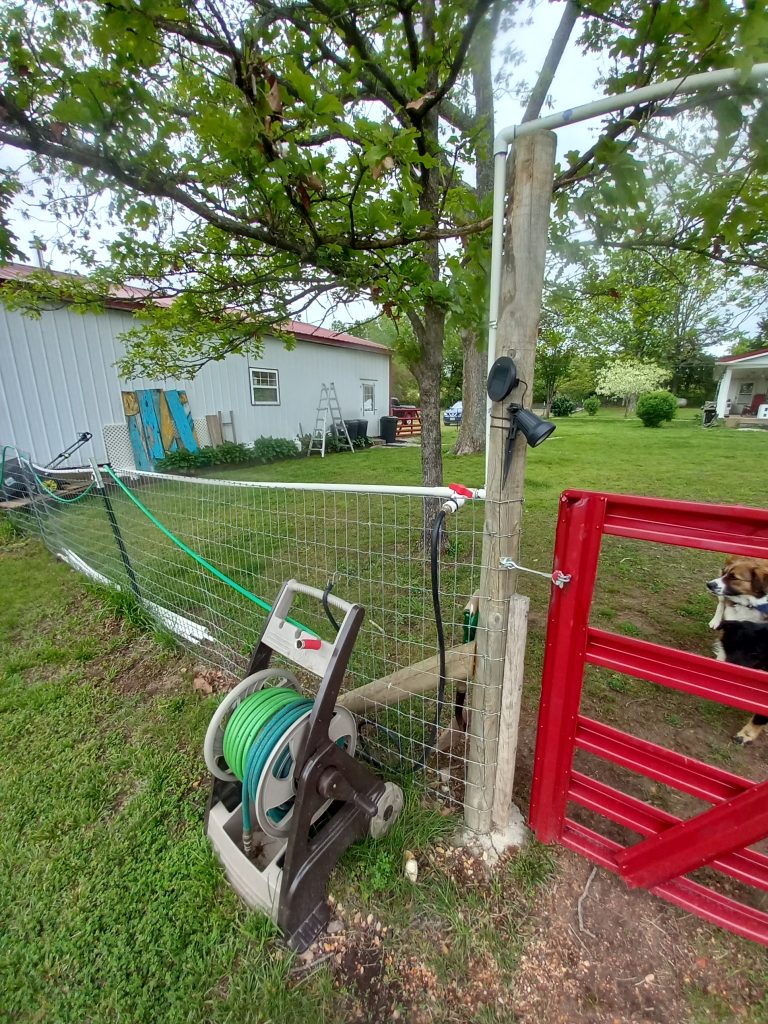
The blue valve at the bottom is used for filling buckets but doubles as a “drain” of that valve system when the water is shut off. Moving up from that valve, the next connection on the left is where the water comes from the source and enters the system. Up from there is a hose running to the outdoor shower (that this is mounted to). The next one up (turned on) is the hose that feeds the line that covers the garden as well as other locations. Up from there is the hose reel (pictured) and the top valve controls a simple 10′ hose and nozzle that hangs on the shower for general use.

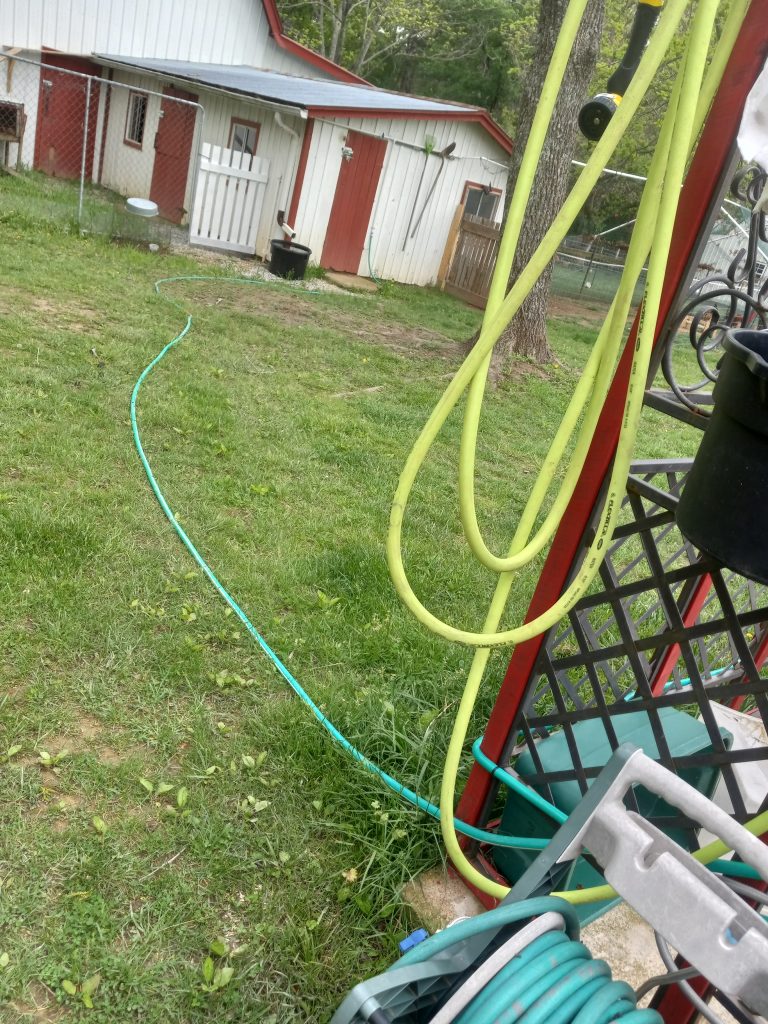
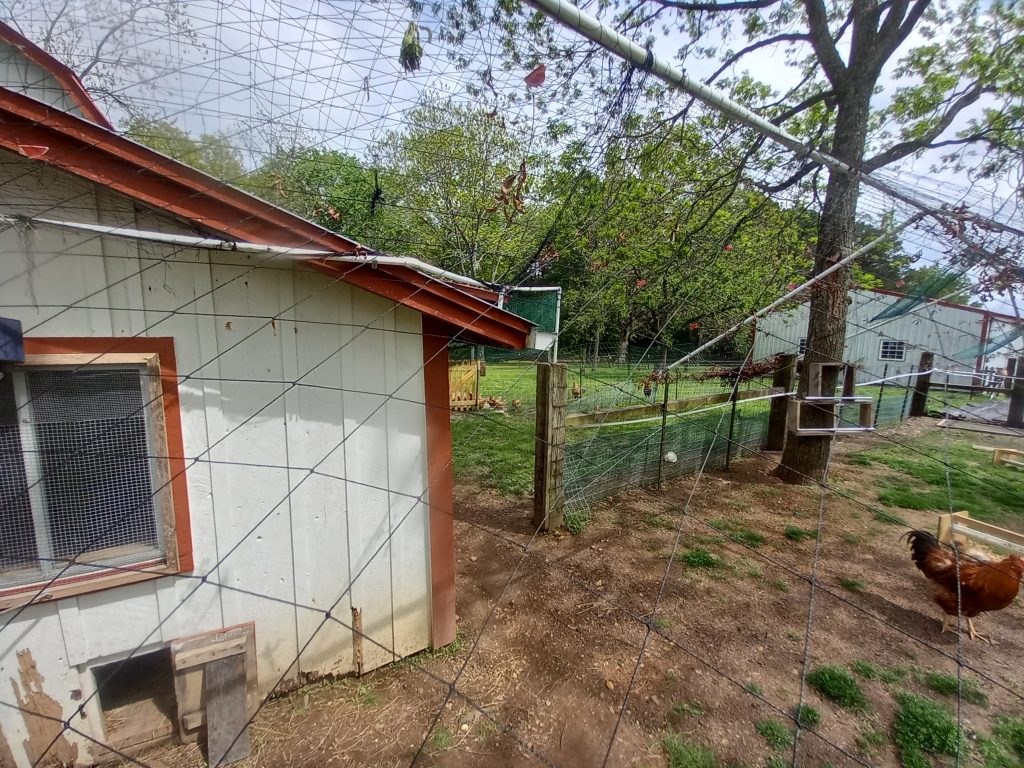
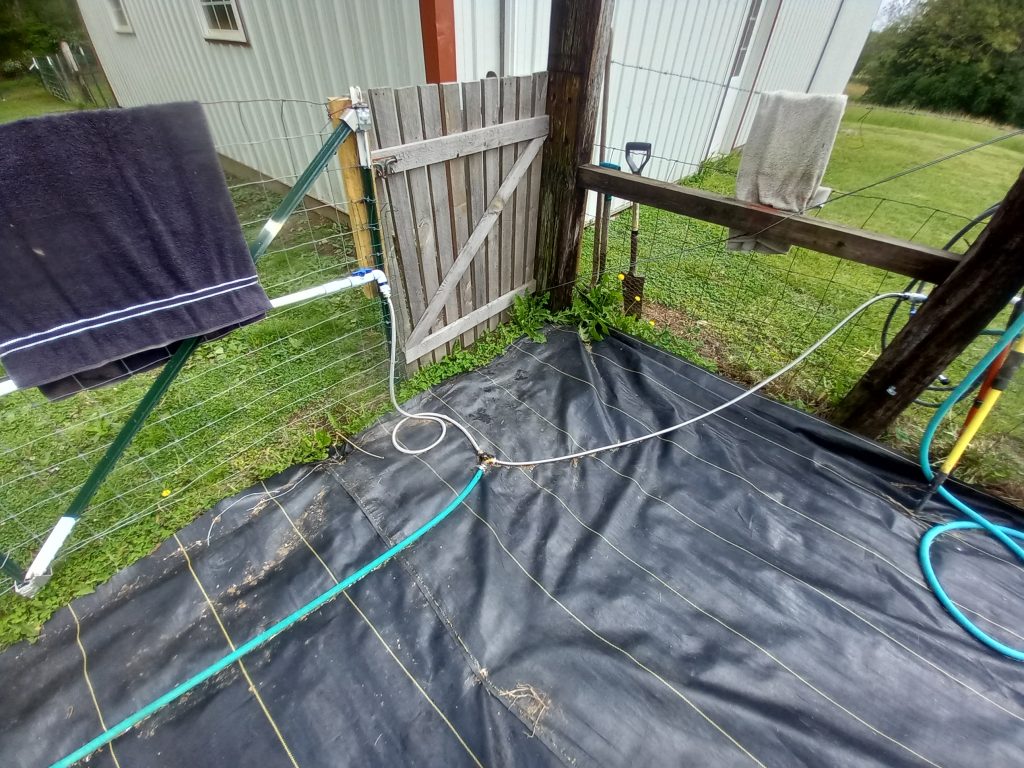
The line that covers the garden and other places runs on the ground over to the front of the chicken coop. As of now, it is a simple garden hose but will eventually be “piped” when I complete a mud free walkway back there.

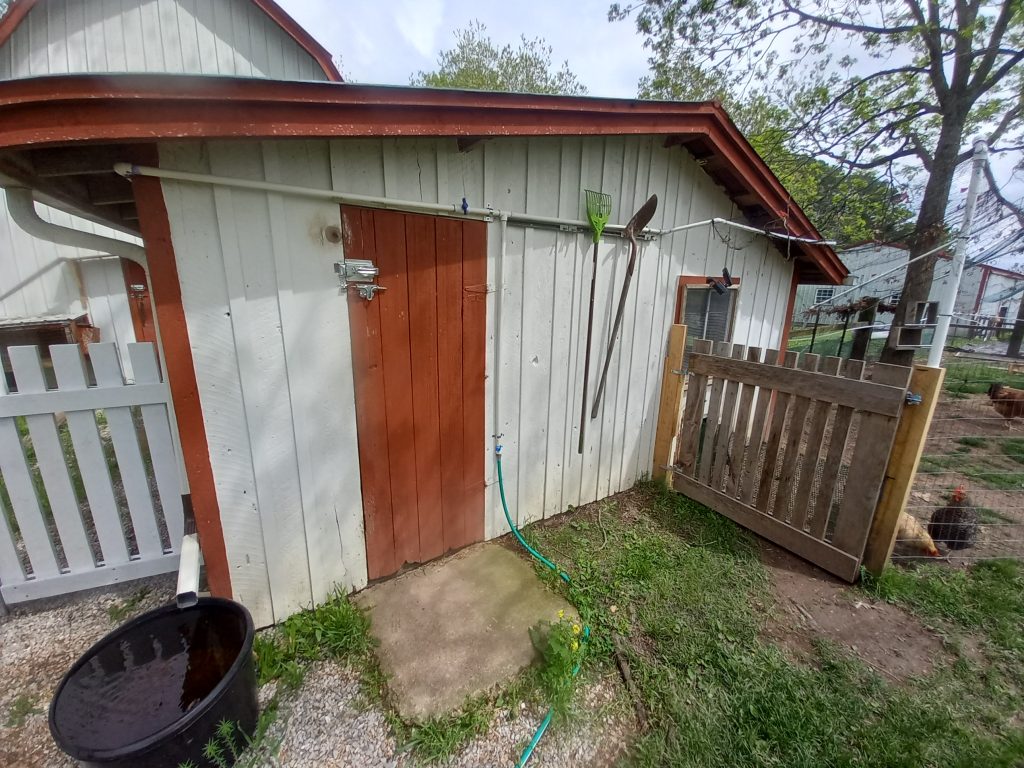
Once there, it screws into a PVC fitting and traverses up to the top of the door where a “T” connection sends a line to the left for inside the barn, as well as another that runs to our camper stored under the lean to. The other line (to the right) continues towards the garden.

The line is up so high because of the gate between the chicken runs. I’m not crazy about this arrangement and may move it to the ground but I’ll wait for it to break and force me to. Actually, this section between the runs will all be redone but works ok for this season.

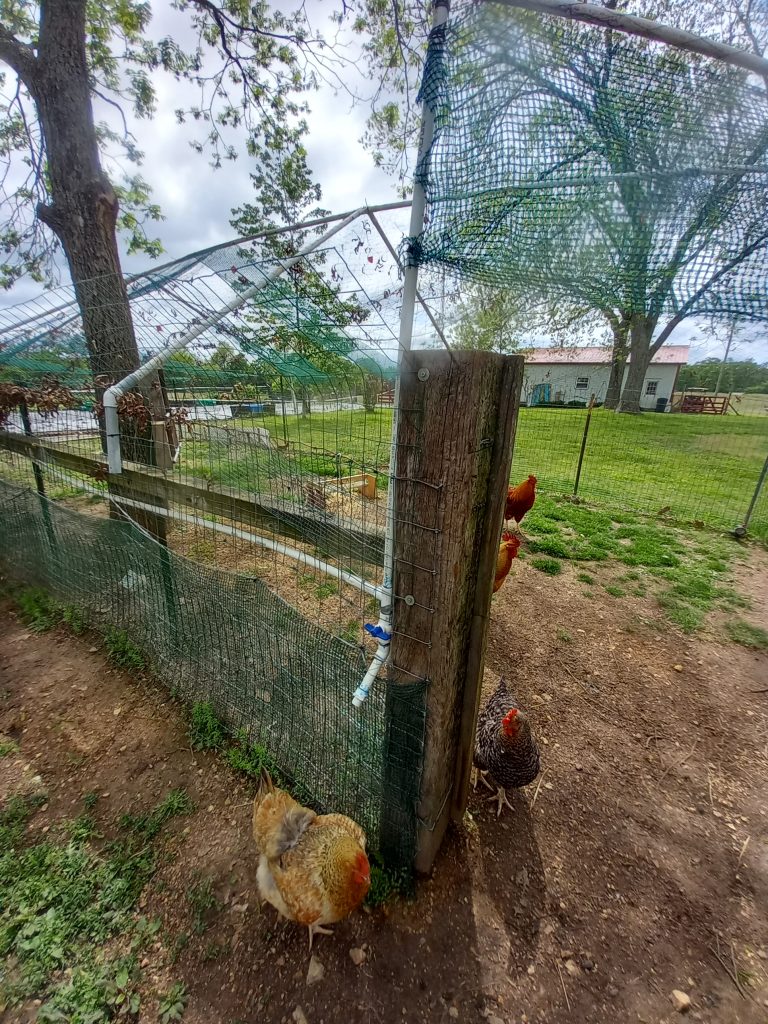
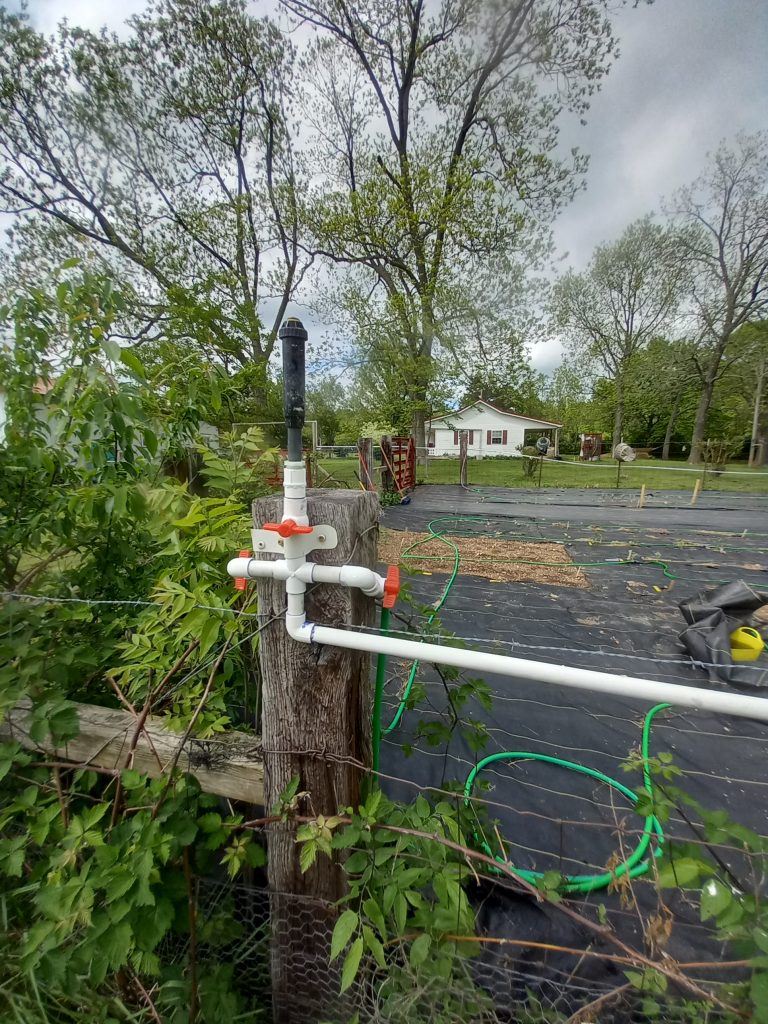
On that first post by the gate is the first faucet available. This spigot previously drained the whole system but I had to change that behavior when I added the additional footage circling the garden as it is just too much distance overall to get the slope exactly right for that distance.

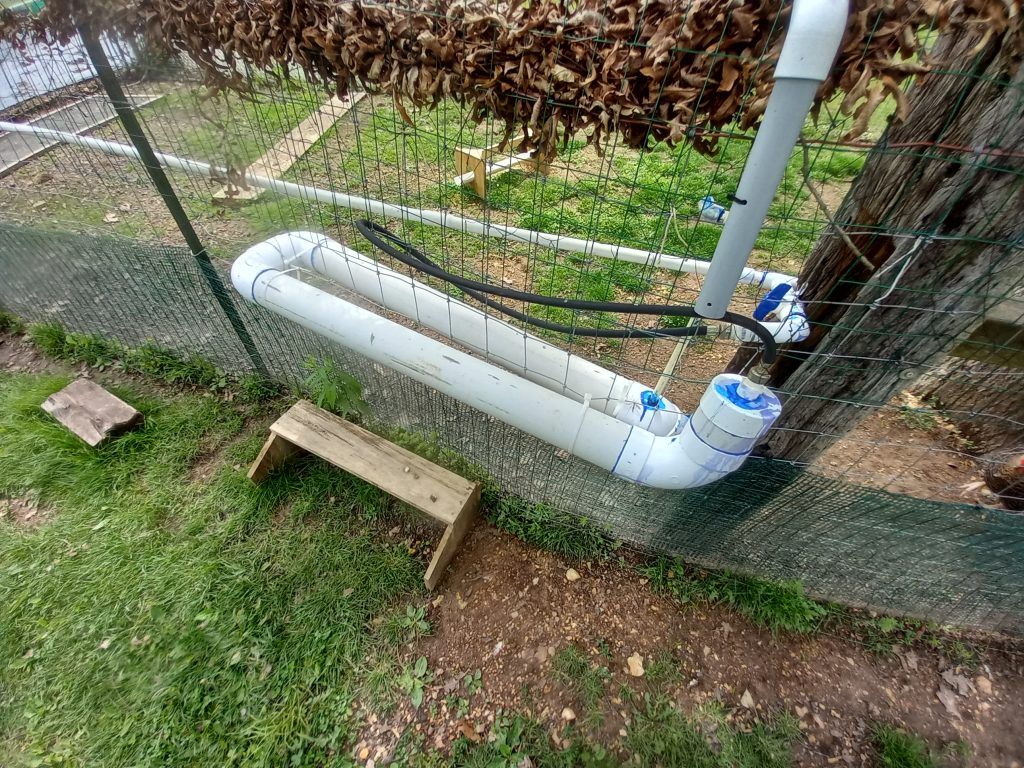
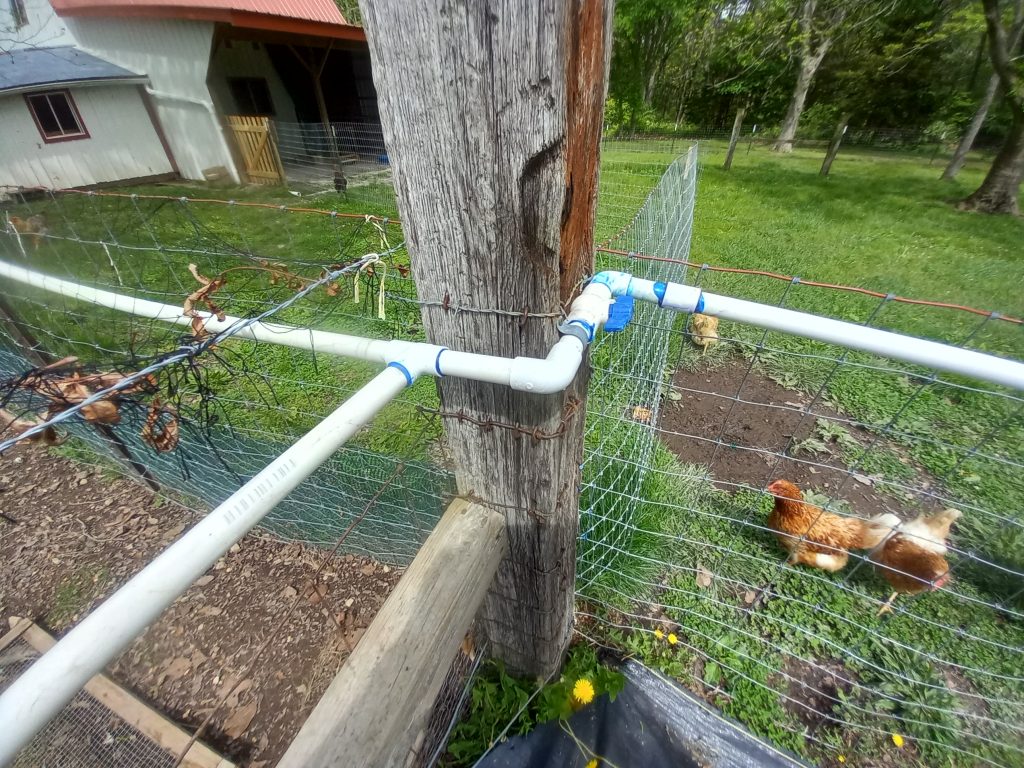
The next post down the run also has a spigot, which is connected to the birds 2-sided waterer. It takes about 15 seconds to refill by turning the valve. The older girls get their water via nipples on the bottom of the larger PVC section. The newer girls on this side are smaller so I built them a bench to reach the nipples.

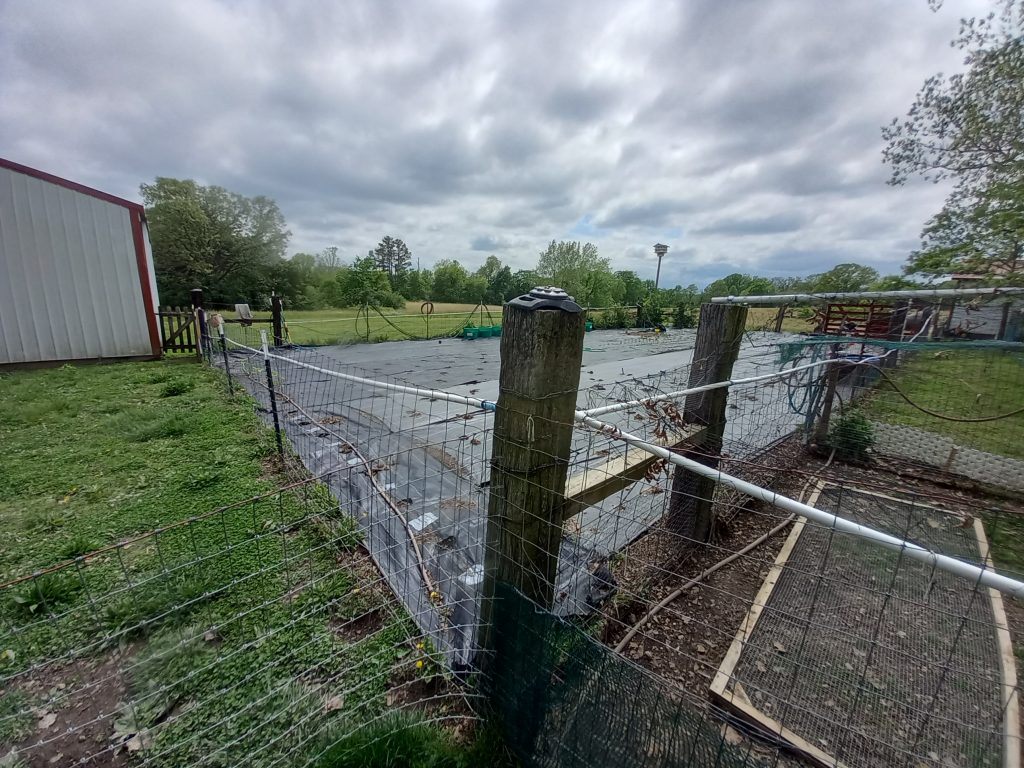
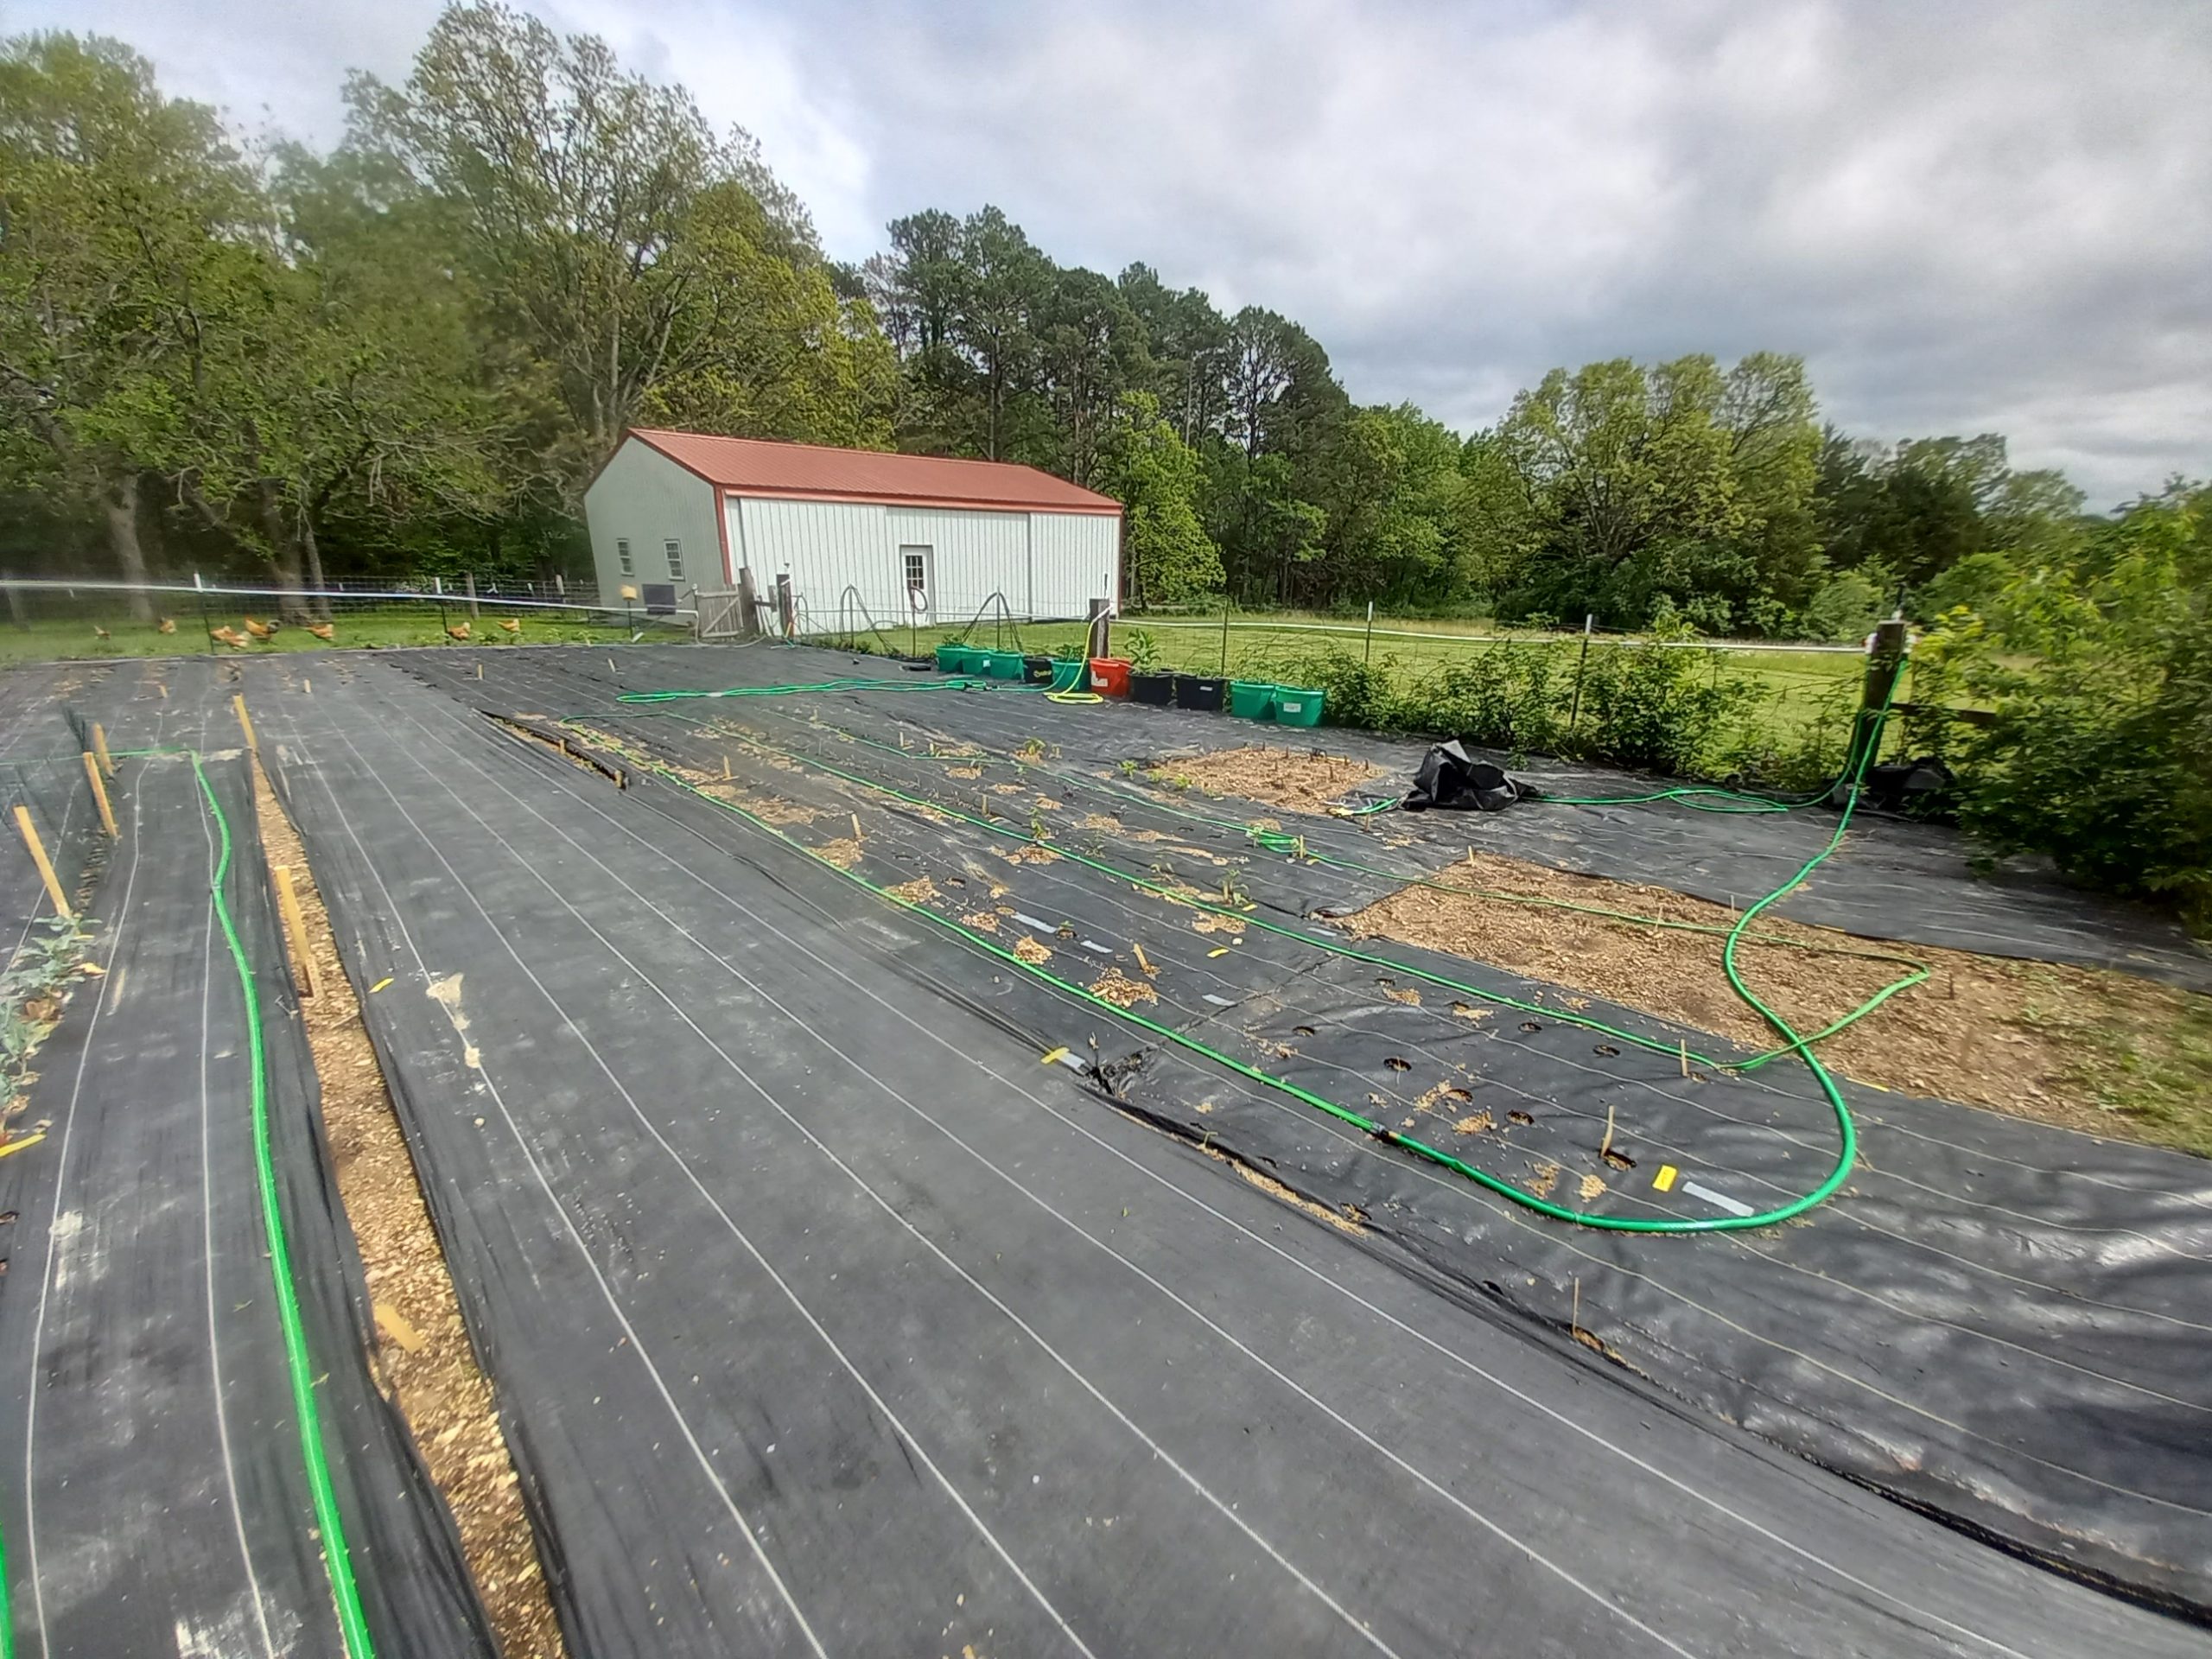
Finally reaching the NE corner of the garden. Here is another “T” with one side continuing straight south towards the shop and then turning along the south side and the other turning westward along the north side of the garden.

At the shop, there is another access gate so I dropped the line to the ground and used “water supply” hoses (typically used to hook up your washing machine or dishwasher) to hook up the south side line. There is an extra splitter valve there on the ground that will drain this “bridging” line when needed. The green hose going left is watering the sunflowers at the back of the garden.

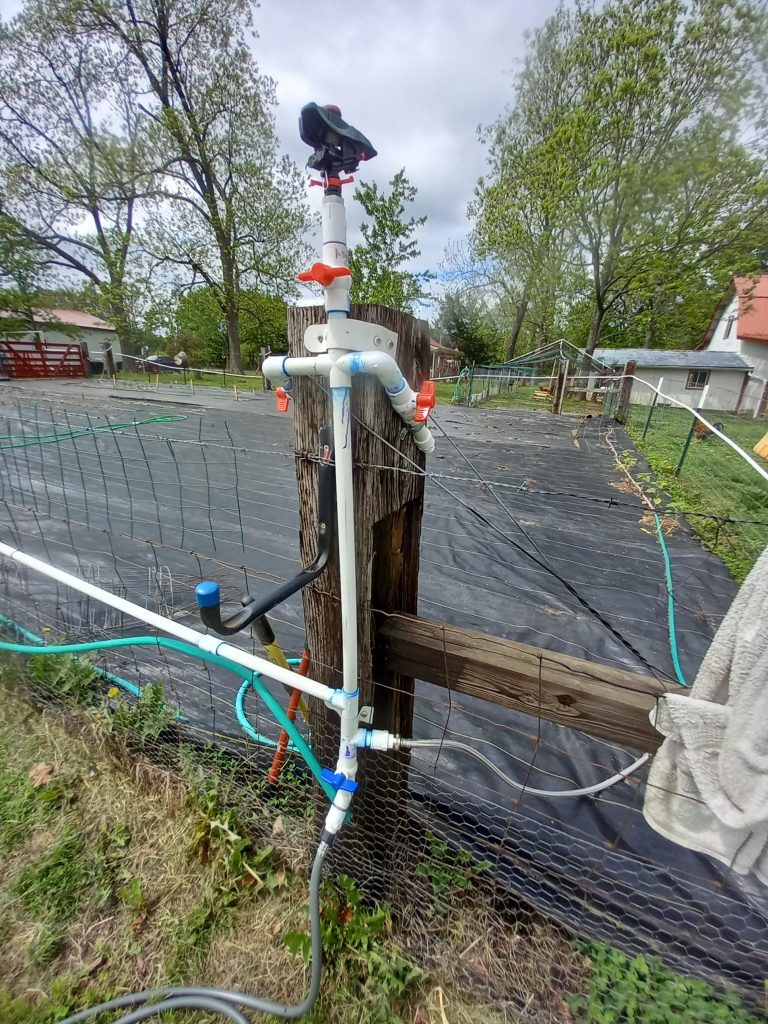
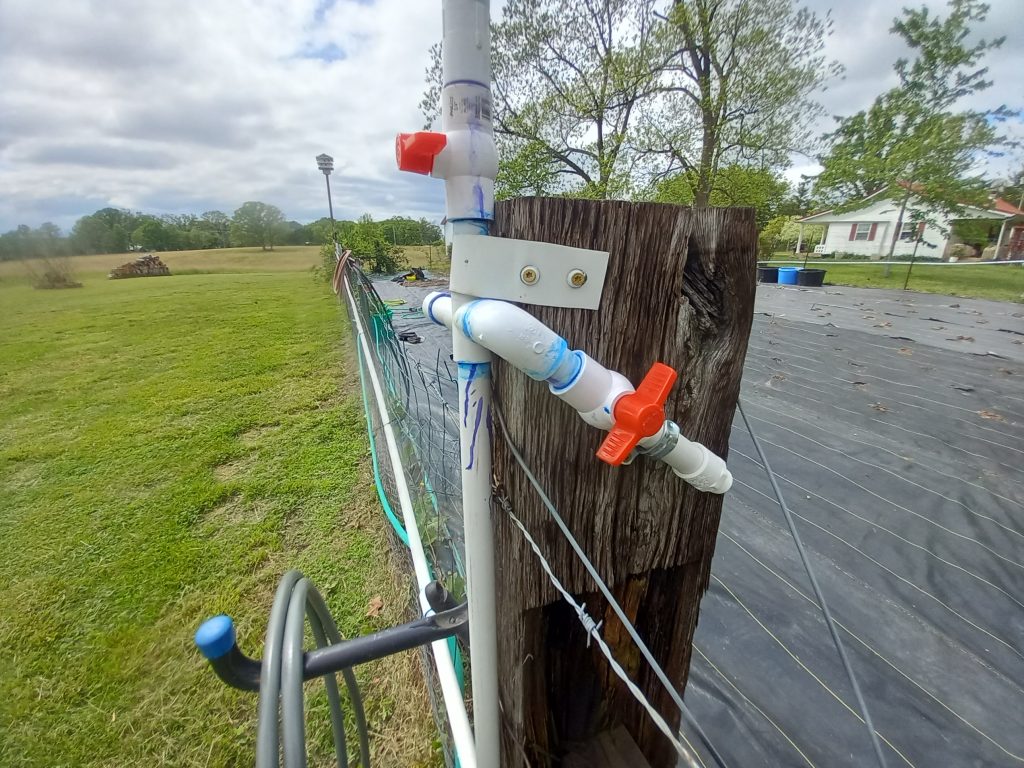
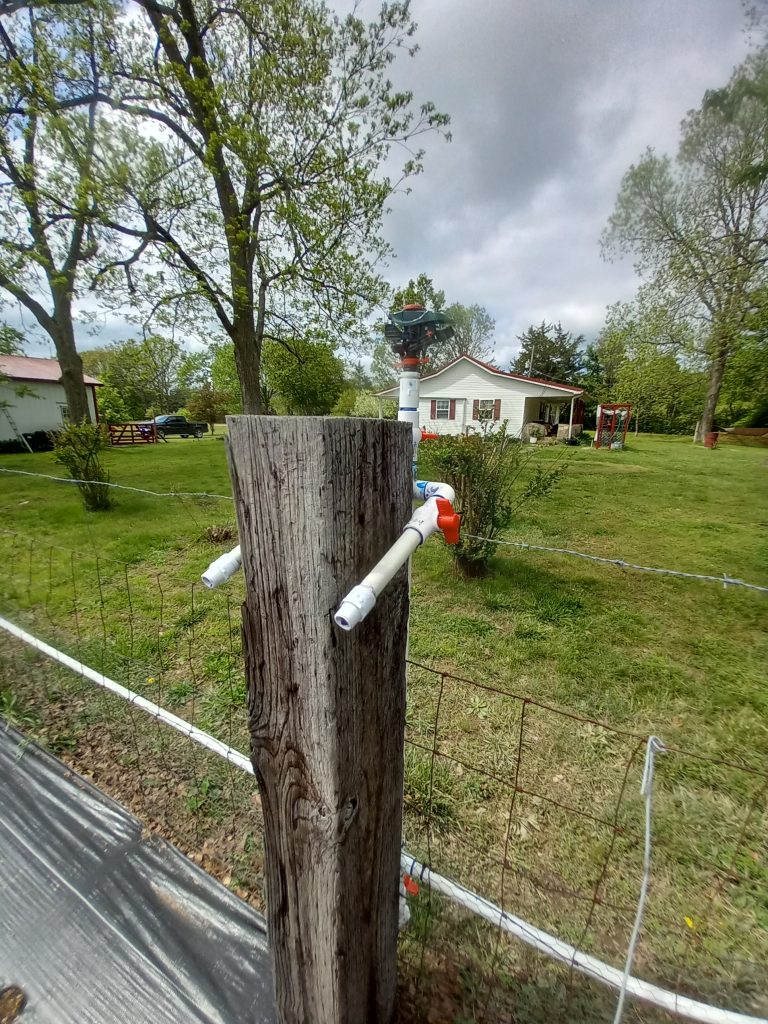
And here (going west on the south side) is the first of 6 “stations” surrounding the garden. The blue valve at the bottom drains the PVC (for freezes) but has a simple 10′ hose and nozzle for general use at the shop (where we do all of the seeding and planting preparations).

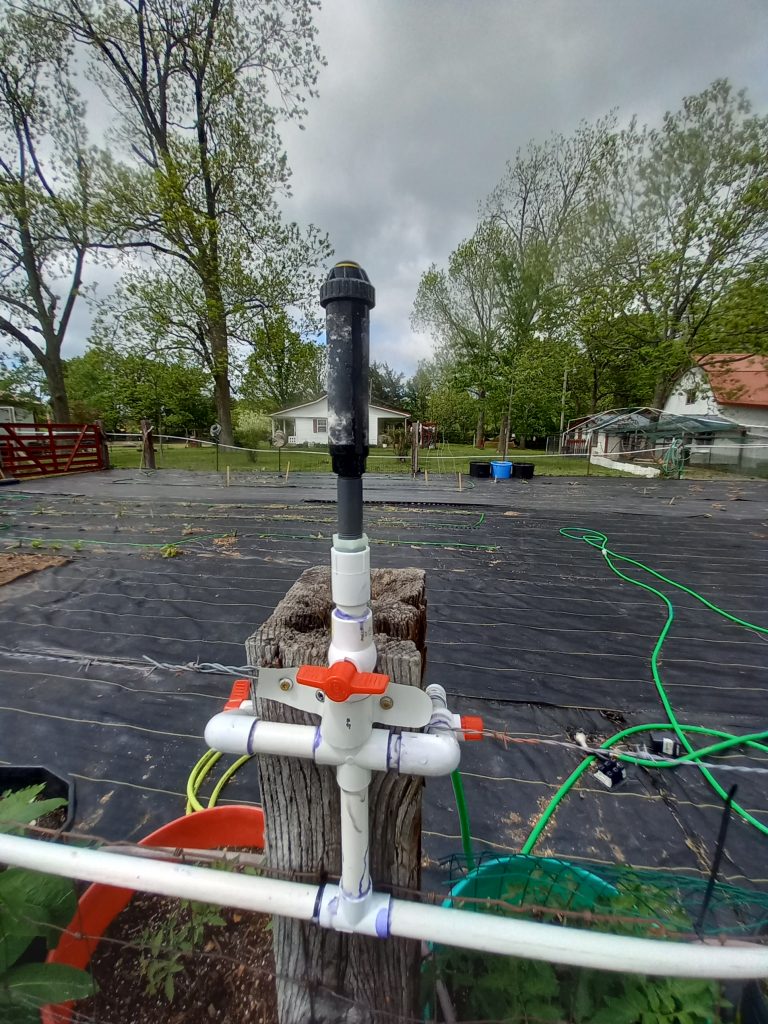
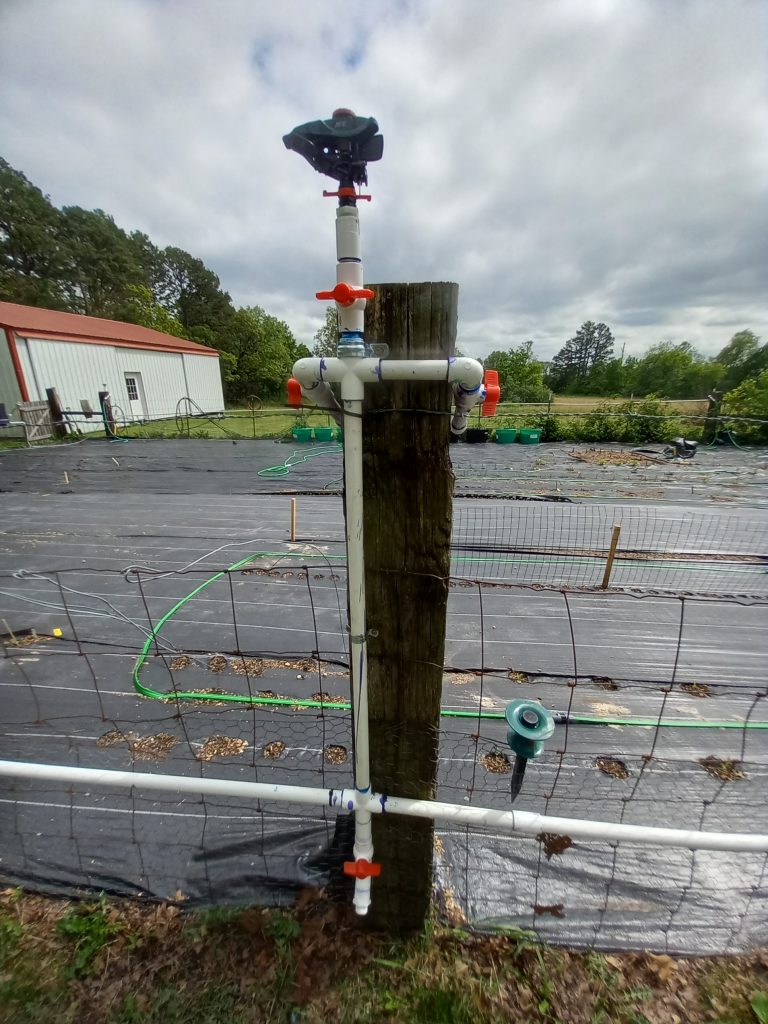
Each of the 6 stations in the garden contains a single sprinkler head that covers that section as well as 2 additional spigots for hoses and drip lines. I might have screwed this up by slanting these downward because a little water could still be trapped above the valves after the lines are drained. I may revise next year.

Moving westward, this is the station at the middle of the garden.

And, at the end of the line (for now) is another station in that corner.

When you step back and see that entire line, you can easily see the slope that drains everything in that zone to the SE corner, where it can be drained away safely to prevent freeze damage. These sections each have their own section shut off/bypass valve so during the colder months, only the sections that are actually used need to be drained.

Returning to the split at the NE corner of the garden, we’ll now cover the north side.

This north side is a duplicate of the opposing south side. Simply 3 more stations – 2 at the corners and a 3rd in the middle.

I like the convenience of not having to enter the garden to “water the birds” so I moved the first station on this side to the edge of the chicken run and mounted the station to a makeshift piece that is banded to a T post.

The middle station.

And the final station at the NW corner. This is also the low point in this zone so it has a spigot to drain the line (or use otherwise).

But, instead of terminating, you see the line continues further to the right (because there is more to cover).

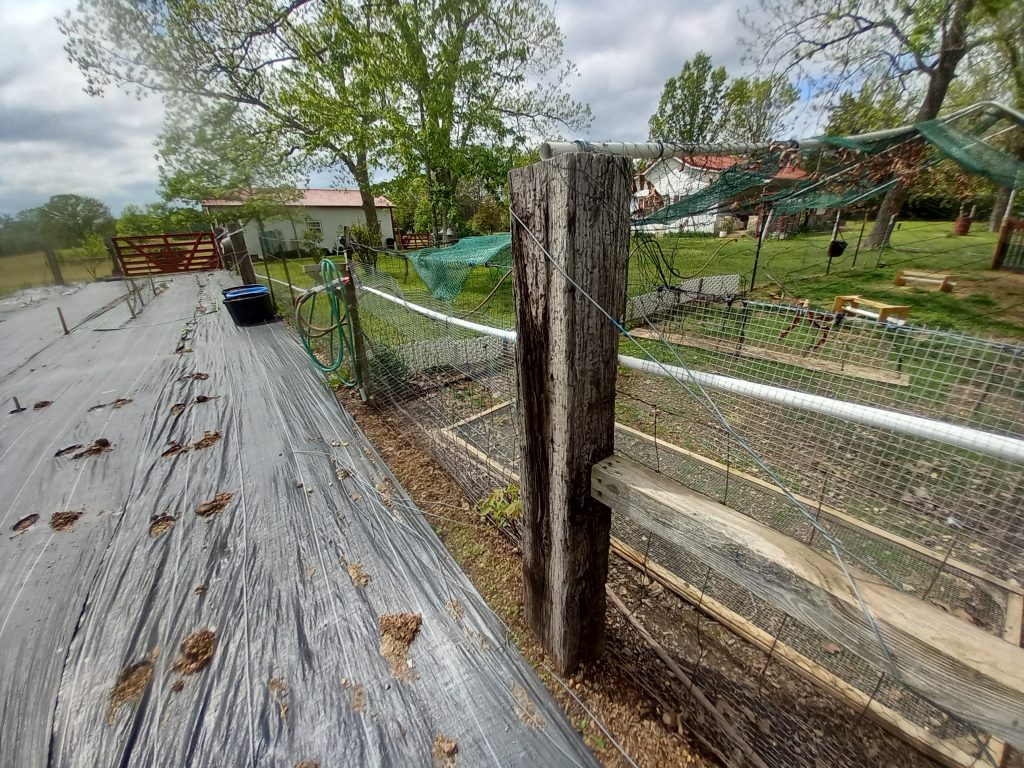
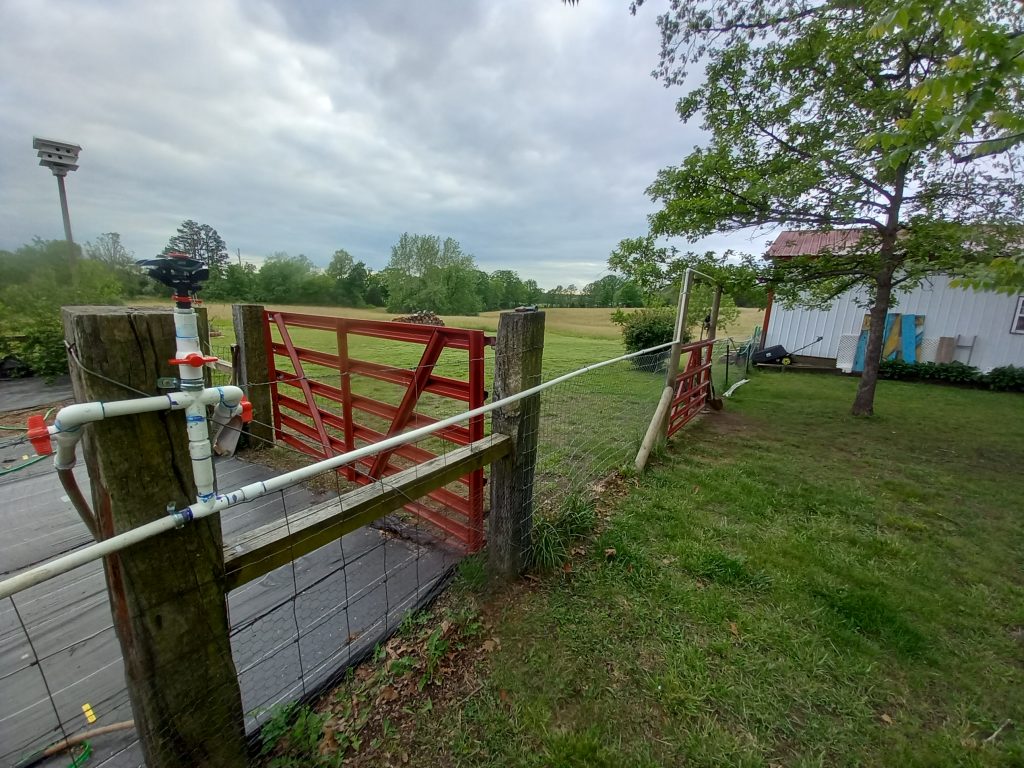
Exiting the garden, the line has to traverse another gate opening so it elevates up over the top of the posts. That elevation creates a 3rd zone going downhill now towards the garage and then turns along side it towards the front. The spigot at the garage front will be the low/drain point for this 3rd section.

As soon as it comes down again after the gate, there is a valve for another hose reel. This is used for brush fires or other needs out towards the field.

The next stop along the line is the compost piles and worm pit so there is a spigot there before the line turns north along the garage.

And then FINALLY at the front of the garage is the final spigot for this line for washing vehicles or other garage uses.

Newest Addition(s)

We’re not sure what we have at the moment but our feral cats have been busy. It seems more than 1 have been impregnated by their “brothers” and one “Caz” was certainly showing so we were expecting some little ones. Sherry set up a maternity room (box) in our feed room in the barn.

We were surprised to see not “Caz” in there but instead learned that “Mister Fatty Pants” is actually a “Missy Fatty Pants” as she was lounging in there with 6 not so new kitties. She must have birthed them elsewhere as they suddenly appeared in the box and look to be at least a week old already.

Knowing Caz still had to pop, Sherry set up another box. MFP moved her family back into the barn under the steps and has since disappeared with all of them.

Caz finally started popping them out but I believe she is having great difficulty. A few were born dead and we think a critter might have gotten a few as well (maybe the lurking possum family). We need to remember, none of these ferals had a mama around for very long as she died while they were still quite young and Caz seems overwhelmed with it all – not knowing what to do.

Then, Sherry noticed this one all alone, freezing cold, near death and no mama in anywhere to be found so she took it inside and started caring for it. We named it “Yoda” and while only a few days old, she is already doing much better.

Considering the shape she was in when she found it, I am really surprised she survived but now a few days into it, she seems like she’s going to make it.

As for the others, we do not know. Maybe we’ll never see them again – and that would be OK with us. Either way, we’ll take whatever comes our way. We heard many folks in the area welcome new kittens (especially the Amish) so not too worried about being overrun… yet.

STILL Playing Possum

UPDATE 3/21 (#4)
UPDATE 3/14 (#3)
UPDATE 3/12 (#2)

I knew it would happen eventually. Actually, we’ve been pretty lucky so far with very few threats.

However, last night about 8 or so, the dogs did their job and quite vigorously announced that they had a critter cornered up against the barn and chicken coop. It ended up inside the enclosure in front of the barn, where the feral cats are free from being harassed by the dogs. The trouble is, this area is just a few steps away from accessing the barn with a flock of 12 young laying hens inside.

We brought the dogs inside and I opened the gate to the enclosure hoping to chase it off but it stayed in the corner snarling at me and wouldn’t budge. It was actually pretty big but then again, my only comparison was a smaller one that snuck into our house in Lakeville through the doggy-door while we were on vacation years ago. It took up residence in our main bathroom behind the toilet. That one I coaxed into a bin and release out back by the RR tracks. This one didn’t fare as well. With no other options, I ended up “dispatching” the varmint with a 22 rifle.

With no want or need for it, I posted on a local FB group and 2 or 3 said they were interested. It would make a neat Daniel Boone hat for somebody so it’s out at our gate awaiting pick up – 1st come, 1st served.

If it’s still there in the morning, I’ll toss it out back in the woods.

I am proud of Lyddie and Cooper for doing their jobs though! Such good guardians they are protecting their birds.

UPDATE: A couple of local trappers picked up the possum this afternoon and warned that it was wise to get rid of it. If it knew there were chickens around, it would keep at it until it killed the entire flock. That got me thinking about strange marks we’ve suddenly noticed next to the door to the “older girls” coop out in front. Granted, these are simple painted pine boards but I can see where these marks might be something trying to claw its way inside. I think we’ve eliminated the problem but still plan to rig up a motion light there just to be sure.

UPDATE 20240312: After 2 more evening encounters, I decided we might have a problem. The dogs do a really good job of patrolling the farm yard and thankfully, do not engage with the vermin. They simply corner them and bark. But, it’s happening enough that I worry there is a local possum family hanging around. I read that they breed like rabbits so I set out a trap.

This might be the only other one as this is about the same (smaller) size as the 2 most recent encounters but I’ll keep putting this out for a while just to be sure.

Now, to decide what to do with this guy. Most advise against releasing them during the day. Well, it’s 8am now…

After checking with the Amish (they didn’t want it), I asked Frankie (at the General Store), who picked up the dead one a few weeks ago. Since the gentleman stops in there frequently, Frankie told him I had another and the guy pulled into the driveway about an hour later. This time he brought a cage and said this one would be set free in the woods by his home as he wants to establish a family of them nearby (to him) since they are so scarce around here right now. He also mentioned he would take any others so I’ll reset the trap and see how many more there are lurking around here. At least now, I can save a bullet and wish it well in it’s new environment miles from here.

For control of ticks, snakes, moles, mice and other rodents, they are great to have around. Just not when we have chickens. The common line I hear is they will decimate your entire flock by eating ONLY the heads of every bird. Luckily, our birds are locked in at sundown but can’t take the chance of one sneaking inside the barn before lockdown.

UPDATE 20240314:
And here is number 3, caught in the trap overnight. This will also be turned over to the local trapper. However, it will live on as he is releasing them in HIS woods. With their scarcity, he is trying to establish a nearby colony so I’ll wish them (both) well. I’ll set up the trap again and see if there are any more.

UPDATE 20240321:
No pic as #4 is pretty much the same as 2 and 3. I was alerted that it was in the trap by the dogs as the trap is set up (out of sight) back under the lean to by our camper. As with the previous 2, I transferred it from the live trap to another cage and alerted Frankie to tell “Trapper Cliff” to stop by and pick it up (Cliff doesn’t have a phone). He usually shows up by noon but by around 2pm, there was no sign of him. Feeling bad for the little guy, I slid in a bowl of water and a tub of cat food. I also cover the cage with towels to keep it calm.

By 7pm, there was still no sign of Cliff and I wasn’t going to keep it in the cage indefinitely so loaded it into the truck to be released somewhere. I was conscious to NOT make it a problem for another farm but luckily, just north of us are thousands of acres of national forest. Our highway (K) terminates at the Current river so drove down to the end and released it there in the river bottoms. I would have preferred it joined its siblings in Cliffs woods but not interested in lodging possum long term. Plus, there’s probably more. Looking out the window now, there might be number 5 out there, the way the dogs are behaving. It’s getting harder to tell as the dogs are almost getting used to the routine by now.

Now the grid can crash

I believe we took delivery of the new generator in October and just now getting around to hooking it up properly. Since Sherry is up in MN visiting family and friends this week, I figured this was a good time to get it hooked up to the house.

I do relish these projects when she is gone. Once, when she went to CA to see her brother, I took down a wall between our kitchen and living room. That was quite the mess to come home to but it was all worth it in the end.

This storm shelter sits about 40′ out behind the house. With the basement dug out in the house, the shelter was no longer needed and sits unused.

I was also surprised to learn that generators are NOT weatherproof and need to be protected from the elements so I put 2 and 2 together.

I mounted an access box to the exterior stairwell enclosure. The generator will plug “in to the house” here.

This will handle 120v/240v and 50 amps. From this box, I ran 6/3 NM-B, Non-Metallic, Sheathed Cable back to the main fuse box in the basement.

Here, I’ve got the new cable entering the box, all the 4 leads cut to length and stripped and the new 50 amp breaker wired up and hanging loose in front. I had to do this all VERY CAREFULLY with the power still on. However, at this point there was no going any further so turned off the main breaker and ran a long extension cord from the barn to light up what I was doing next.

I shouldn’t be surprised that the only 2 available spots to mount the ground and common wires were in slots with stripped screws so had to combine a few of the smaller gauge wires to free up room for the big fat 6 ga wires. But, I got them all securely installed.

Then of course, because of the lock out device, I had to install the new breaker on the left side just below the main breaker, which meant everything else on the left side had to slide down 2 slots to make room. Luckily, they all had enough wire “play” available to easily move them down a few inches to make room.

This “lockout” device protects power company linemen from getting zapped while working the lines during outages. It assures that power you are generating is NOT sent out to the grid and is isolated to your house only.

This is a temporary solution as the goal is to energize the entire farm (4 buildings). For that, I’ll need a similar hook up box for the power pole where our meter is located. That will be coming in April from our electric cooperative.

Now, I’ve got to figure out that secure door to the shelter.

Not to worry. Everything is just swine!

Glancing out the front door last night, I saw a “shape” out in the driveway in front of the garage. Knowing the dogs were inside, I thought it was a stray so was ready to chase it off when I saw it turn a bit and take a few steps. There was no doubt what it was – a PIG! Before I could grab a light and have a closer look, it meandered down the hill behind the garage and disappeared into the pasture.

This morning, I went out to take a closer look and saw many prints around the firepit but the ground wasn’t disturbed so it’s doubtful an entire sounder of ferals was wandering through and was more likely a domestic that got loose. I believe the Amish neighbor across the road has a few pigs so will ask him about it.

Regardless, reading up on it, feral pigs/hogs are quite a problem in Missouri and many other states. A farmer friend a few miles up the road had quite a problem with them and had the conservation department come to run them off. Even though they are considered pests and invasive nuisances, they recommend NOT shooting them as that action is detrimental to the goal of eliminating the whole group.

https://mdc.mo.gov/wildlife/invasive-animals/feral-hogs-missouri

It’s an interesting read and likely something we’ll have to deal with sometime in the future so it never hurts to be ready. I thought it would be interesting to set up a few trail cameras anyway – just to see what wonders by.

Back when we graduated High School, I helped a friend (Martin) “process” a pig that he raised for a pig roast at his grad party. I wish I would have paid better attention back then. My only “processing” so far has been a single rooster and is something I’ll need to work on. But, I’m sure those chances to improve those skills will come soon enough.

« Older posts Newer posts »

© 2025 good4.us

Theme by Anders NorenUp ↑